2015 Silverado 1500 Tailgate Easy Assist Issues
Talk to a Silverado 1500 Enthusiast
1-888-706-1096
G-F 8:30A-11P, Sat-Sunday 8:30A-9P
-
 Shop Silverado 1500 Select Year
 - Modify Vehicle
Barricade Tailgate Assist (07-18 Silverado 1500)
Item S111243


Call a Silverado Enthusiast at 1-888-706-1096
One thousand-F 8:30A-11P, Sat-Sun 8:30A-9P
Frequently Bought Together
-
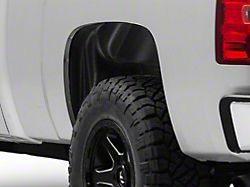
Rough Country Rear Wheel Well Liners (07-13 Silverado 1500)
$99.95
Video Review & Installation
Hey, guys. Adam here with americantrucks.com. And today, we're taking a quick await at and installing the Barricade Tailgate Assistance available for the '07 to '18 Silverado 1500. I got to say, guys, this is something that I definitely recommend for anyone looking to make your life a little bit easier when information technology comes to operating your tailgate. At present, normally, when you're operating your tailgate, you lot're trying to get something in or out of the bed and you probably have your hands total at that point. Now, dropping your factory tailgate without this installed, the tailgate comes slamming down, has absolutely no support, nothing to slow it downward at all, it tin be pretty tearing and very loud. Adding this tailgate assist puts a strut on the driver side underneath of that cable from the meridian and attaches to the side corner of the tailgate in that location to help it come up down smooth and easy. To show you guys what I'g talking about here, I'g just going to bring it up and allow it go. And y'all tin meet how effortless that comes downwardly with no loud bang whatever. Now, the nice thing about this is the install is extremely elementary. At that place'south no drilling, there's no permanent modifications, none of that nonsense. And it price about 30 bucks. For this detail matter, I call up information technology's a no-brainer for anyone with a Silverado looking to become a very impactful modern for nether 100 bucks, because that's really all this is. It's really all pros, no cons.At present, in my opinion, this is something that should have come on the Silverado from the manufacturing plant many years ago. It wasn't the case until about 2019 there with the remodel, this particular option here, I definitely pick upward from my own truck. And the install, I'm giving one out of three wrenches on our difficulty meter, considering you tin tackle information technology in 30 minutes or less with very uncomplicated hand tools. It does involve a rivsert that's going to come on a preassembled bolt, you lot're then going to install that on the side of your tailgate, pull the bolt dorsum out and the rivsert volition still exist installed. And from in that location, it'south really just snapping on some brackets. It'south super simple. I'g gonna prove you guys every pace of the process, let'due south get started. All correct. Tools used in this install include an bear on gun, 3/viii ratchet, v/32 hex socket, 3/16 hex socket, 13-millimeter deep socket, x-millimeter wrench, a paint mark, and measuring tape.All right. The first thing we're going to do is drop our tailgate and I'm gonna have the pressure off of the tailgate strap on our commuter side by merely propping it up here on my hip. Now, we take to remove that xiii-millimeter bolt. Before we practice that, we're gonna pull up on this tab, push the strap upward and pop it off of that commodities. All right. And so this is loose. At present what we do is remove the 13-millimeter bolt birthday. Catch your 13 deep socket and get it off. And so, now what we're going to do is slide that 13-millimeter bolt into this oval-shaped bracket with a little knob on the bottom. That'due south going to become right up within of hither on your driver side. Everything that we're doing here is going to be on our commuter side. I'one thousand gonna tighten this downward past mitt but and then we know that it'south positioned properly. All right. And tighten it down. Now, what we can do is prop that tailgate upwardly again, and we're going to reinstall the strap, putting that bolt through the bottom while lifting up on the retainer prune and it locks dorsum in identify.All right. So, next upwards, nosotros're taking a look at this nutsert bolt. Now, this is included in the kit preassembled, but if y'all don't accept it preassembled, y'all want to make sure that you lot have the nutsert followed by a washer, bearing, washer, nut, and then bolt caput. So what nosotros're going to do is basically adjust this so that from the washer to the bolt caput is 3/4 of an inch long. And then, I've got my tape measure out hither, I'thou going to prop it up here. If you already take it all the way back downwardly, it's about 1/4 of an inch. And so what nosotros need to practise here is loosen up the nutsert then that that'southward similar that, nosotros're going to measure out out 3/4 of an inch. Looks like nosotros need but a fiddling bit more. Perfect. And then from there, you're basically only going to back this nut dorsum down similar a jam nut collar. All right. So, once you to take that backed all the mode down and it'southward tight, double-check 3/4 of an inch, we're going to motility on.All correct. Next upwardly, nosotros're going to take that nutsert assembly, nosotros're going to insert it into the hole on the side of our tailgate on our driver side. At present, if it's tight, you desire to take a rubber mountain and tap it in. Ours is loose, so we're just going to concur information technology hither. The next step nosotros're going to practice is take a paint marking or a pen of some sort or sharpie that you can hands see. What we're going to do is basically mark the top of the nut along the threads, and I'm gonna mark the bolt head also right hither. What we're basically going to practise is hold this nut, put an Allen primal on the end here, and rotate it 9 full rotations. So, having these marks conspicuously visible is going to aid u.s.a. know how many rotations nosotros've fabricated. What that's basically going to do is equally we tighten this bolt downward, it'due south going to expand that nutsert and the nutsert is going to stay in that tailgate. And and so we're going to pull the assembly out and the nutsert volition be threaded. All correct. And then I'chiliad simply going to agree this with my x-millimeter wrench. And I take my three/sixteen Allen socket here or hex socket and nosotros're going to tighten this guy up. Now that we've marked that, we're basically going to do 9 total rotations tightening downwardly that bolt to get this nutsert to stick into the tailgate. Then, ix full rotations, and it'll exist tightened on there. All right. Then with that in position properly, I'yard going to switch over to my touch gun and accept the unabridged commodities assembly out, which volition leave the nutsert in the tailgate. All correct. So, now that'south in there equally a threaded hole and we tin commodities down the 2d plate.All right. Adjacent up, you're going to take this plate hither that has the open curve at the cease. This curve is going to hug in at the end of that tailgate and this open pigsty will line upward with the threaded hole we just put in there. One time y'all have that in place, grab the hex screw and you're going to tighten that downwardly to the nutsert. Grab your appropriate Allen key or hex socket and tighten that down. All correct. So, now I'm switching over to a v/32 hex socket. It'south recommended to use blue Loctite on the threads of this bolt here. We're skipping that step considering we are going to uninstall it at the end of the video, but it's recommended at that place if you're planning on leaving it on long-term. Next stride, take the strut, make sure the tops are screwed downwardly all the way. You lot don't desire any threads showing. Now, the shaft here is going to be at the toward the tailgate end. The trunk is going to be upward there toward the taillight region. Basically, you lot're going to snap this onto the stud on the bottom just by putting a footling pressure. For the top, yous may need to elevator the tailgate up a bit to become it to friction match, press that on, and let it drop. And at that place you have information technology.All right. At present that we accept this installed, rapidly, I desire to show you guys how it works. Information technology's really unproblematic. Yous just need information technology on the driver side. Shutting the tailgate is the exact same, nothing changes about it, just now when you're dropping the tailgate, all you have to do is that and y'all tin back off and let it go and information technology slowly comes dorsum down effortlessly. There's no slamming dissonance that you lot get from the stock tailgate. Without this installed, gets really trigger-happy from the factory. My opinion, just should have been there all along.That's going to wrap up my review and install for the Battlement Tailgate Aid for all '07 to 'xviii Silverado 1500s. Choice i up for yourself right hither at americantrucks.com.
Subscribe: New Silverado videos daily!
Subscribe to our YouTube Aqueduct
Product Data
Features, Description, Reviews, Q&A, Specs & Installation
Features
- Prevents Tailgate from Dropping When Opened
- Tedious, Smoothen Operation
- Designed to be Install on the Commuter Side Merely
- Uncomplicated Bolt-On Installation
- Non Compatible with 2007 Silverado 1500 Classic Model
- Fits all 2007-2018 Chevrolet Silverado 1500 Models
Description
Installation & What's in the Box
Installation Info
Installation Fourth dimension
(approx) thirty Minutes
Difficulty Level:
Elementary installation for anyone.
What's in the Box
- Lower Ball Mount
- Upper Brawl Mount
- Damper
- Installation Hardware
4.half dozen
Customer Reviews (100+)
Questions & Answers
Word on the Trail
Easy to order, responsive customer service, no questions asked! Will lodge again. Oh, Gratuitous Aircraft is as well great.
Meet Our Team

Jody D, White Diamond '12 Silverado LT IT Support Manager
I purchased my 2012 Silverado LT towards the finish of 2012. I previously had a 2004 Corvette that no longer fit my lifestyle hauling kids from sporting event to sporting event. I needed a vehicle which was more than dual purpose, but I didn't want a "work truck".
Source: https://www.americantrucks.com/duratrek-tailgate-assist-0718-silverado-1500-chevy.html
Post a Comment for "2015 Silverado 1500 Tailgate Easy Assist Issues"